Build
The BOM Build functionality enables to you book finished goods items into stock and reduce component stock in one process.
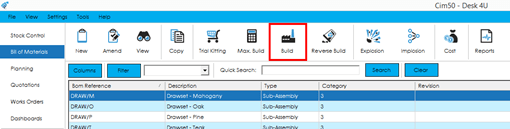
When selecting the Build option from the BOM list, if you have one or more bill of materials selected, they will be pulled through onto the Build screen automatically.
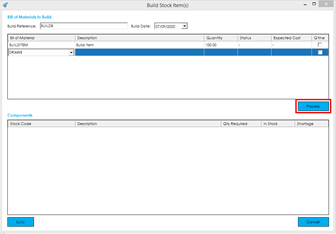
Build Screen
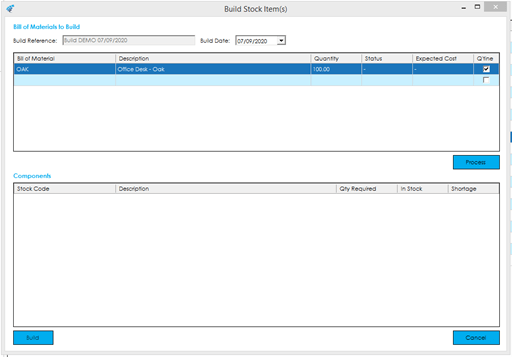
The BOM Build screen contains the following fields and information:
Build Reference: Depending on your BOM Settings, the build reference may be pre-filled and greyed out, or available for you to enter a value into.
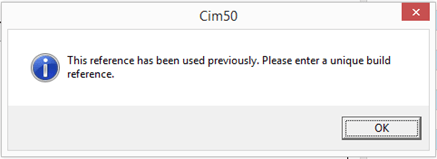
If you have manual build references enabled, the build reference must be a unique reference specific to this build. Should you enter a duplicate value, you will be presented with the following message:
Automated references are referenced in 3 parts:
| 1st Part |
2nd Part |
3rd Part |
| BUILD |
Username |
Date |
E.g. “BUILD MARTIN-M 07/09/2020”
Note: This field is limited to 30 characters. As such, if your username is particularly long, you may find part of the date is chopped off from the automated reference.
Build Date: The date that the stock transactions processed, during the Build, will use.
The grid at the top of the screen contains the items that you wish to build into stock. If you had pre-selected one or more BOMs from the BOM list, when selecting the Build option, this list will be pre-filled with those selected items.
Bill of Material: The bill of material/stock code(s) that you wish to Build. You can add additional items to the list by clicking into this column on the first empty row, and either using the drop down control, or typing in the stock code of the built item you would like to build.
Description: The description for the items that you wish to build.
Quantity: The quantity that you wish to build. This is defaulted from the Bill of Material ‘Default Costing Quantity’ defined on the BOM record.
Status: This column will initially display “-“ until the build process begins. Once the 1st stage of the build process has been completed, it will display either ‘OK,’ or ‘Shortage’, depending on the result of the 1st stage build trial kit.
Expected Cost:. This column will initially display “-“ until the 1st stage build trial kit is processed. Once processed, it will display the calculated expected unit cost price for the quantity to be built.
Carbon Emissions: If the system is enabled to capture carbon emissions, an additional ‘KgCO2e’ column will be visible. This shows the calculated carbon emissions for the quantity costed at the time.
Q’tine: This column indicates whether the items booked into stock should be transferred to quarantine for inspection or not.
The Process button is used to start processing a BOM build.
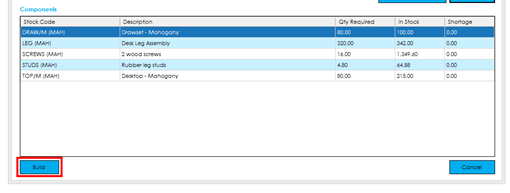
The ‘components grid’ contains a list of all the component and sub-assembly items that would be consumed as part of the build process. The columns contain the following information:
Stock Code: The component item stock code, along with the parent BOM the item belongs to (contained in brackets).
Description: The component item description.
Qty Required: The component quantity needed to build the parent item quantity requested.
In Stock: The component item free stock quantity available.
Shortage: The shortage quantity for that item.
Note: The BOM Build process will not build sub-assembly items automatically if there is a shortage of the sub-assembly component. If you are also building a sub-assembly item as part of the same build, this will not be considered in the available stock figures when that item comes to be used.
As such, if you had a shortage on a sub-assembly item, you would need to process a build for the sub-assembly item first, then a subsequent build for the top level item that consumes the sub-assembly.
The Build button is used to complete the BOM build process. Further information on this is contained in the following section.
Processing a BOM Build
To process a BOM build, select the items you wish to build, populate the BOM Build Reference, if required, and press the Process button.
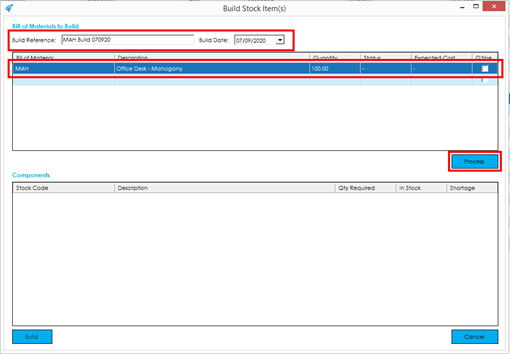
The 1st stage of the BOM Build process is for the system to carry out a Trial Kit of the items that are to be built. This is to ensure enough component stock is available to carry out the build. As such, the behaviour on this screen is very similar to the Trial Kit screen.
Once you have pressed Process, you will find the Status and Expected Cost columns populated, along with the Components grid detailing the components that would be booked out of stock if the build continued.
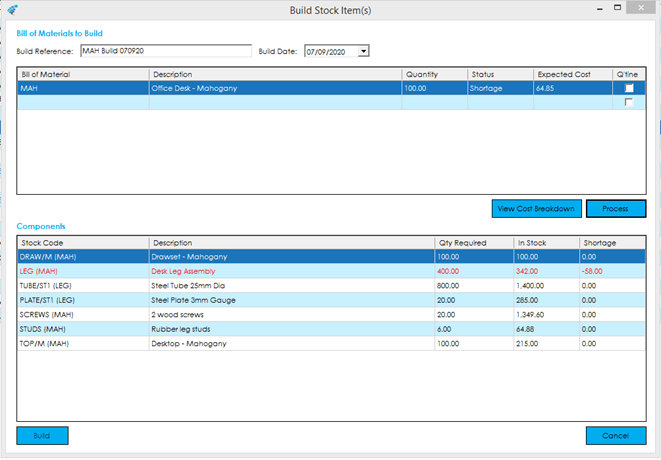
In the example above, we have a shortage of LEG items. Items with shortages are highlighted in red.
If any item on the build shows a shortage, the build will be unable to complete and the Build button will be disabled. As such, we will need to adjust the build quantity to enable the build to go through.
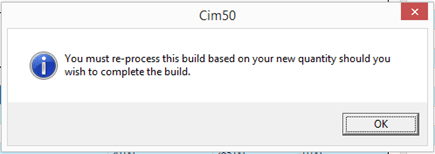
Note: Should any changes be made to the items in the ‘Bill of Materials to Build’ grid after processing the 1st stage of the build, you would be presented with a message advising them they will need to re-process the 1st stage before continuing.
Once the 1st stage process is complete and all items to be built show a status of ‘OK’, you can proceed to confirm the build by pressing the Build button located in the bottom left hand corner.
When the build is being processed, it will firstly go through and issue component stock to the build. If any of the components are traceable, you may be presented with a traceable issues screen (this will be dependent on the setting ‘Automatically select traceable items to issue’). Functionality on this screen is the same as the traceable issues screen covered within Stock Control.
The component issue is displayed in the stock history as an ‘MO’ transaction type, with the BOM Build reference either showing in the ‘Reference’ column, or ‘Details’, depending on whether the item is traceable or not.
Non-Traceable Item:

Traceable Item:

Once the component items have been issued, the system will book the finished item into stock. If the finished item is traceable, you will be presented with a traceable ‘booking in’ screen, as covered during the ‘Traceable Adjustments’ section in Stock Control.
The finished item is booked into stock and shows as an ‘MI’ transaction type, with the build reference detailed in a similar manner to the screenshots above.
If the option to book the items out to quarantine was selected, you would find that the finished item is initially booked into stock, showing the ‘MI’ transaction first, followed by an ‘AO’ transaction, adjusting the stock into quarantine for inspection.

Once the build is finished, you are presented with a confirmation message: