The component tools screen enables you to carry out tasks on BOM components across multiple/all Bill of Materials in one go. There are 3 functions available, all accessible from the same screen in separate tabs.
Home > Knowledgebase > Cim50 > Bill of Materials > Tools and Utilities > Component Tools
The component tools screen enables you to carry out tasks on BOM components across multiple/all Bill of Materials in one go. There are 3 functions available, all accessible from the same screen in separate tabs.
There may be scenarios where a new item needs to be added to multiple Bills of Material. This can be achieved from this tab.
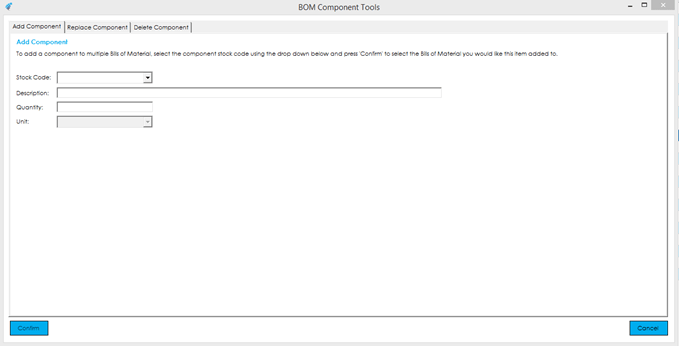
To add a component, use the ‘Stock Code’ drop down, or type in the stock code of the item you wish to add. The description will be pulled through and cannot be edited (it is shown for reference purposes only).
Define the quantity you would like to use when adding the item to BOMs, along with the unit of measure.
Upon pressing Confirm, you will be presented with a screen that allows you to select the BOMs you would like to add the item to:
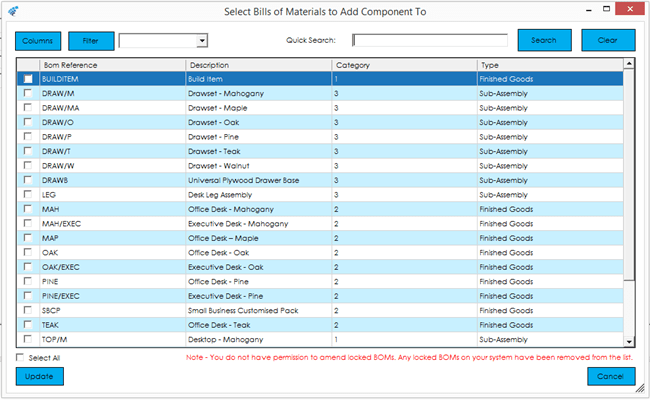
You can search and filter items with the same functionality as searching and filtering on a module list view. To select the BOMs you would like to add an item to, click in the tick box against the relevant BOMs in the far-left hand column.
Note: If you do not have permission to amend locked BOMs, any BOMs that were locked would be removed from the list and could not be selected.
Once you have selected the BOMs you wish to add the item to, press Update to continue. The item will be added to the selected items, with a progress bar displayed whilst this is processing.
An entry will be added to the BOM audit log advising that the item was added via the component tools screen.
If a component item becomes obsolete, there may be a requirement to replace that component with an updated version or different item. If the item exists on multiple BOMs you can replace them all from this tab.
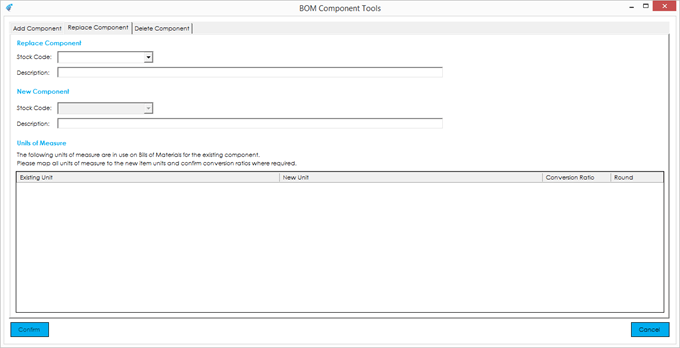
To replace a component, use the ‘Stock Code’ drop down, in the ‘Replace Component’ section, to determine the item you wish to remove from BOMs. The description will be pulled through and cannot be edited (it is shown for reference purposes only). Then repeat the exercise in the ‘New Component’ section, selecting the item you wish to replace the obsolete component with.
Once you have done this, you will find the ‘Unit of Measure’ grid now contains rows detailing the units of measure currently in use for the existing item on the BOMs its used in.
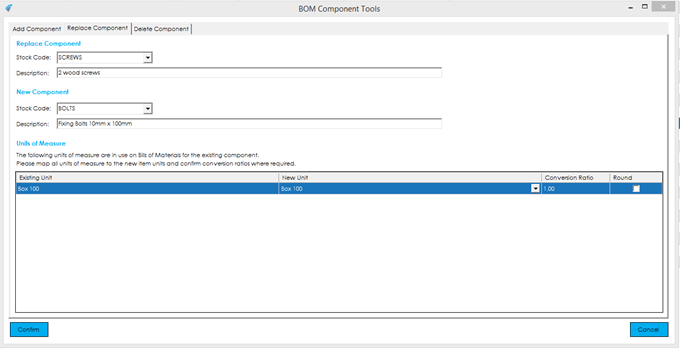
If the replacement item contains the same UOM as the item its replacing, the ‘New Unit’ column will be populated with the same unit. If no equivalent exists, you will need to select the appropriate unit of measure you would like to use instead. You can input a conversion ratio to convert the old quantity based on the new unit of measure, as required.
For example: In the screenshot above we are replacing SCREWS with BOLTS. Currently Screws is used in ‘Box 100’ on all the BOMs it exists on. If we select ‘Each’ in the new unit option, 1 bolt is not equivalent to a box of 100 screws. As such we would need to set the conversion ratio accordingly.
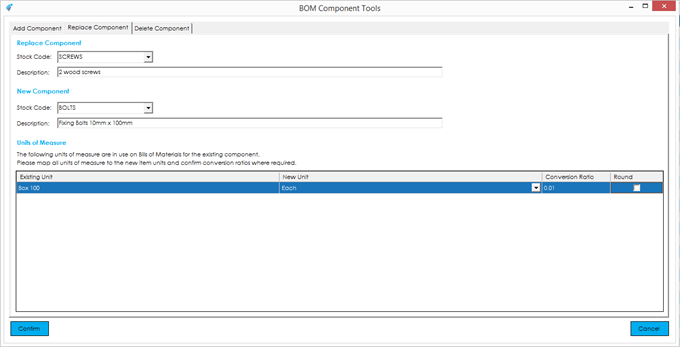
Adjusting the conversion ratio would result in the quantity of the item being replaced. It would be divided by the conversion ratio, to account for the revised unit.
In the example above, 0.1 x Box 100 – SCREWS, would become 10 x Each – BOLTS.
Once you have configured all of the units of measure, press Confirm and you will be presented with a screen that allows you to select the BOMs you would like to replace the item on.
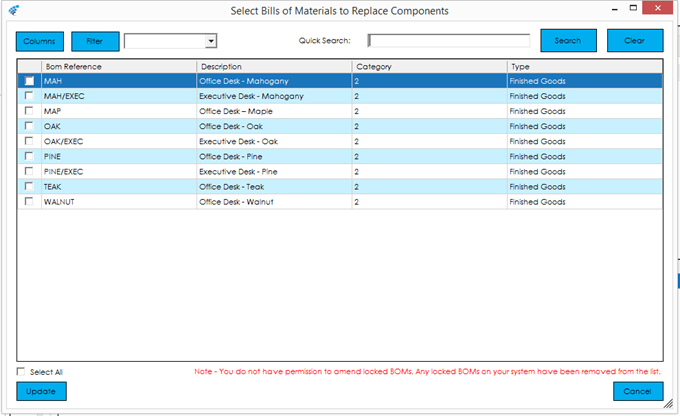
Note: You will only be presented with a list of BOMs that the replacement item exists on.
You can search and filter items with the same functionality as searching and filtering on a module list view. To select the BOMs you would like to replace the component on, click in the tick box against the relevant BOMs in the far-left hand column.
Note: If you do not have permission to amend locked BOMs, any BOMs that were locked would be removed from the list and could not be selected.
Once you have selected the BOMs you wish to replace the item on, press Update to continue. The item will be replaced on the selected items, with a progress bar displayed whilst this is processing.
An entry will be added to the BOM audit log advising that the item was replaced via the component tools screen.
There may be times when a component needs to be removed from multiple BOMs. The delete component tab enables you to do this.
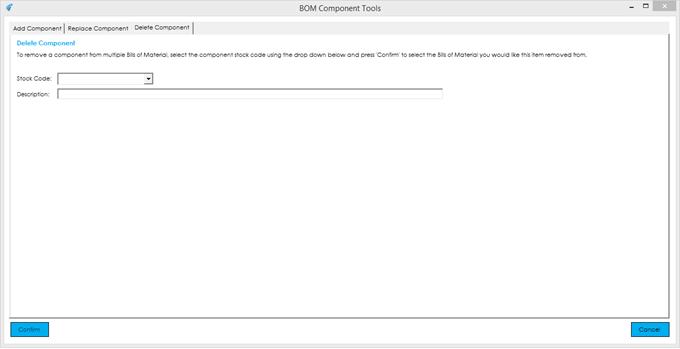
To delete a component, use the ‘Stock Code’ drop down in the ‘Delete Component’ section, to determine the item you wish to remove from BOMs. The description will be pulled through and cannot be edited (it is shown for reference purposes only).
Once you have selected the item you wish to delete, press Confirm and you will be presented with a screen that allows you to select the BOMs you would like the item removed from.
Note: You will only be presented with a list of BOMs that the item exists on.
You can search and filter items with the same functionality as searching and filtering on a module list view. To select the BOMs you would like remove the item from, click in the tick box against the relevant BOMs in the far-left hand column.
Note: If you do not have permission to amend locked BOMs, any BOMs that were locked would be removed from the list and could not be selected.
Once you have selected the BOMs you wish to remove the item from, press Update to continue. The item will be removed from the selected items, with a progress bar displayed whilst this is processing.
An entry will be added to the BOM audit log advising that the item was removed via the component tools screen.
Manufacturing Software Solutions for Sage
Park House, Franconia Drive
Nursling Industrial Estate
Southampton
Hampshire
SO16 0YW