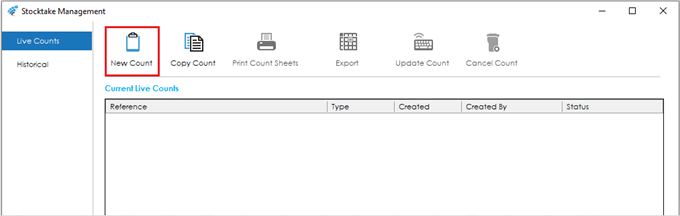
New Count
To create a New Count, select the New Count Feature.
The following screen will appear allowing the selection of Stock Items to be counted.
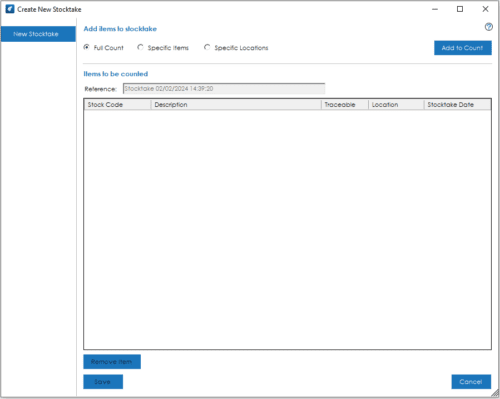
The screen is broken down into the following sections, the fields, and buttons within them are described below:
Add Items to Stocktake
There are two methods of adding stock items to a Count, and these are detailed below.
Note: A Stock Item can only belong to one count at a time.
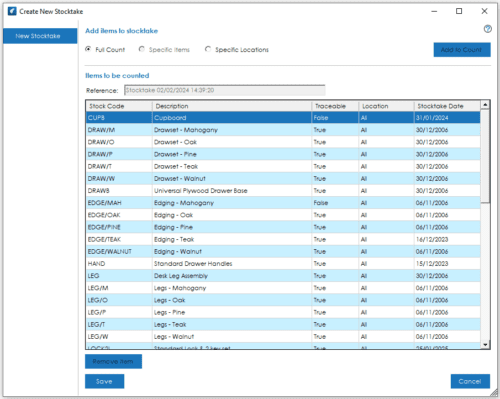
Full Count: When this radio button is active, all Stock Items will be added to the grid, once the Add to Count button is selected.
Specific Items: When this radio button is active, the New Stocktake filter will appear and functions in the same way as the filters that are available from the main Stock Record list. Further details can be found in the Stock Control List Columns, Filter, Quick Search and Show Inactive Items section of this guide.
Note: Specific Items is recommended for companies with higher number of Stock Items or Traceable Items, allowing you to split the Stocktake down into manageable groups of records, this improving the efficiency of the Stocktake process.
Example filters could include a specific Stock Category, Quantities in Stock or an Analysis Code, therefore allowing a company to split up the Stocktake into multi Counts for different areas, teams, or individuals.
Note: For Traceable records (Batch/Serial Numbers) the Quantity in Stock will refer to the Traceable record quantity and not the overall stock quantity of the Stock Item concerned, allowing zero Quantities to be excluded or included on a separate list.
Also, if the filter is created by location, this will be specific to the location of the Traceable record.
Once the filter has been created click Confirm and Add to Count and the Stock items that meet the filter criteria will be added to the count.
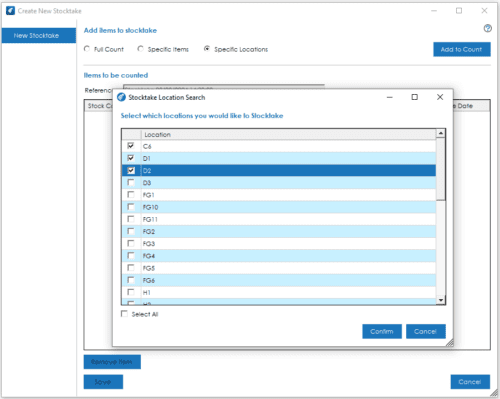
Specific Locations: When this radio button is active, the Stocktake Location Search will appear, allowing the selection of specific bin locations.
For non-traceable stock items the location will be taken from the Location on the ‘Main Details’ tab of the Stock Item and for Traceable Records (Batch and Serial Numbered) the location will be taken from the traceable record Location field.
Once the locations have been selected click Confirm and Add to Count and the Stock items and Traceable Records that are associated with the selected locations will be added to the count.
Items to be Counted
On selection of a Full count or Specific Items, the ‘Items to be Counted’ grid will be populated accordingly.
Reference: This is the unique reference given to the Stocktake.
Note: This can be auto generated based on a setting in Settings> Stock Control> Stock Settings to Auto Generate stocktake Reference. If auto generate is switched on, this will be based on the date and time the stocktake was created.
Items to be counted grid: The grid details the Stock Code, Description, whether the Stock Item is Traceable or not, Location and Last Stocktake date.
At the bottom of the grid there is a button that allows selected stock records to be removed from the Stocktake list if required.
Save and Cancel
Save will record the Stocktake list as a ‘Current Live Count’, allowing count sheets to be printed etc. from the Stocktake Management screen. The following fields will be available to view:
Reference, Type (Full or Partial), Date Created, Created By and Status.
Cancel will return the user to the Stocktake Management screen without saving the Stocktake list.
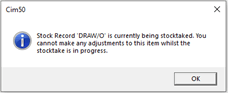
Note: By default, whilst a Stock Item is part of a Stocktake, it is not possible to carry out any stock movements within Cim50. This includes Adjustments, Receipt of Goods, Despatch of Goods, Credit Notes, BOM Builds, Issues to Works Orders and Completion of Works Orders.
If a transaction is attempted, the following message will be shown in Cim50.
If you would like to allow movements of stock whilst a Stock Item is part of a Stocktake, there is a setting to ‘Allow stock Movement during Stocktake’ that can be checked, within Settings> Stock Control> Stock Settings.
See also
Related
Other tasks